Getting Started with Business Manager
Now that you know about the responsibilities that you have with your sandbox, let’s do some exploration.
The URL to access your sandbox should be in the following format:
https://devXX.XXXXXXXXX.demandware.net/on/demandware.store/Sites-Site
Sandbox Credentials Setup

Once you try to access your sandbox, you should be presented with the following screen:
If your sandbox doesn’t have two factor authentication enabled fill username and password with your sandbox credentials to login. If two factor authentication is enabled, click in Log with Account Manager button and user your Account Manager credentials to login and enter Salesforce Authenticate pin code (maybe push notification is sent to your mobile phone to login).
Business Manager Interface
Once you first log in you will be presented with Business Manager welcome page.
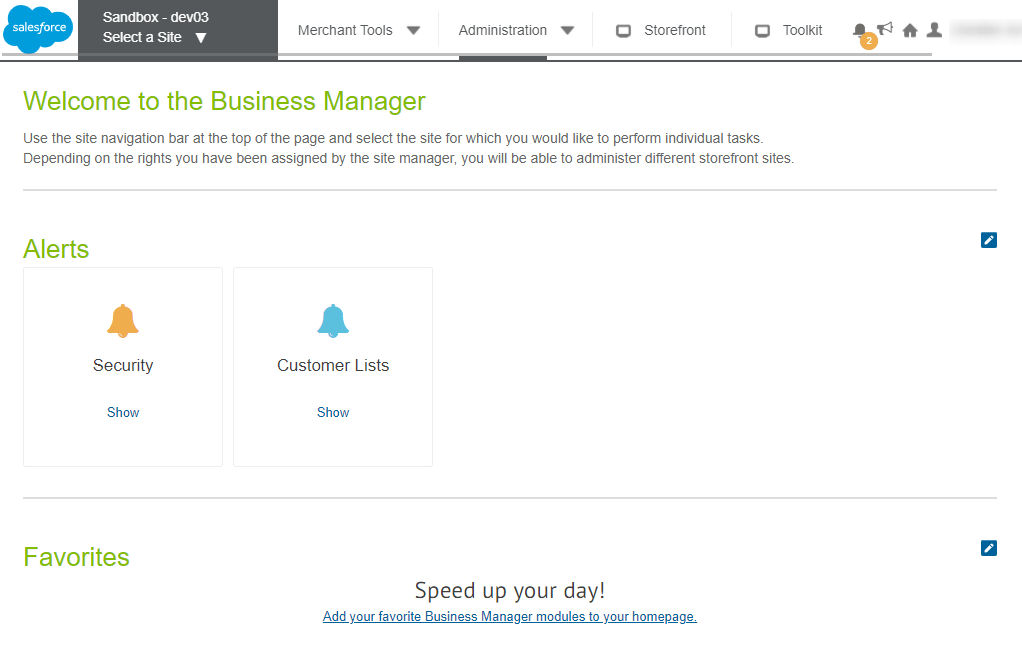
Business Manager contains menus for Administration tasks as well as to site-specific (Merchant Tools) tasks. Administration menus:
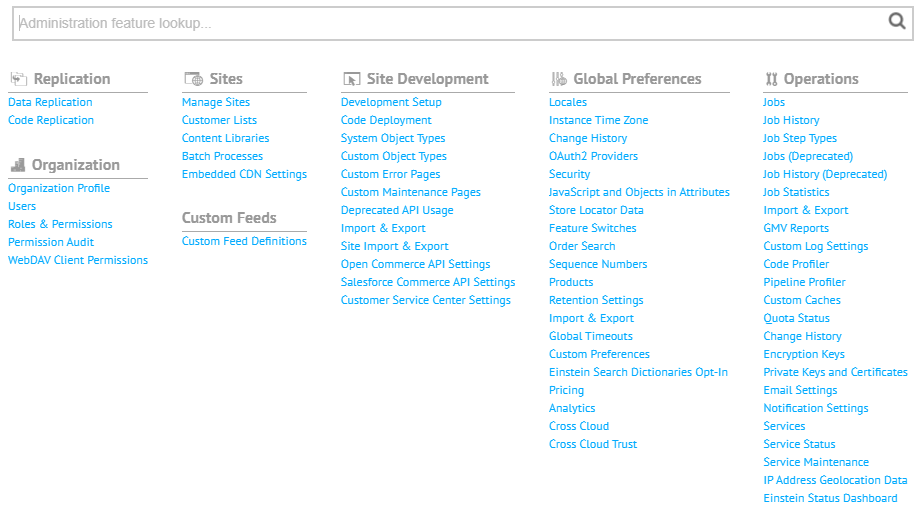
The merchant tools menus:
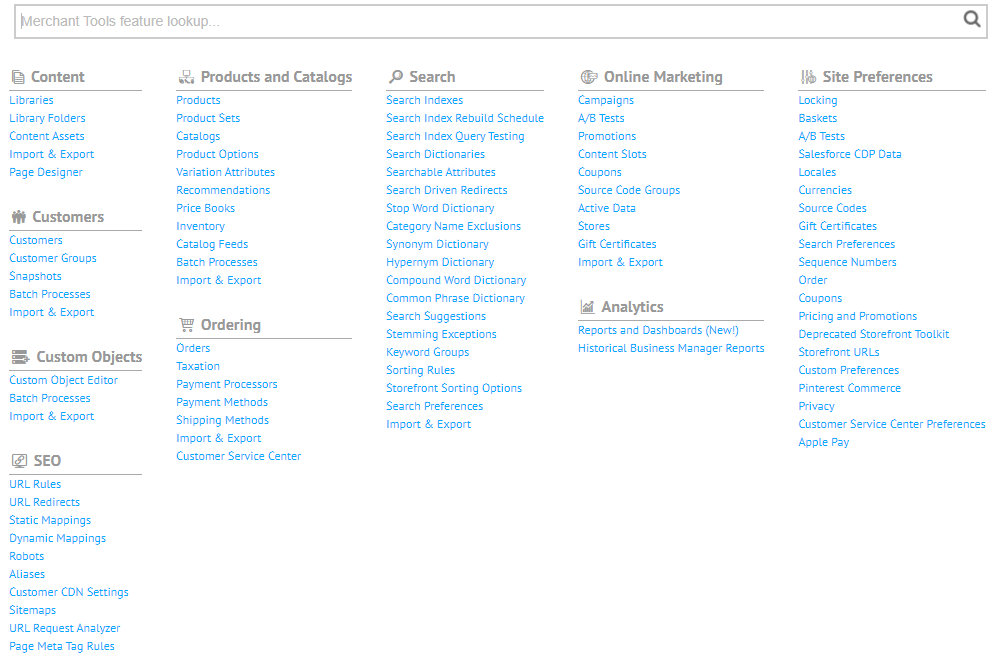
The modules displayed depend on your role and the privileges assigned to you by your Administrator. If you need access to an additional menu item or a module, ask your Administrator to provide access.
The Administrator is able to create roles and privileges inside Business Manager.
Right now you won’t be able to use the Merchant Tools menu as you don’t have a site imported yet. This will be our next step.
Sites
Your instance might have multiple sites. You can have different sites to offer different brands in different countries.
When you first log into Business Manager for a given instance, by default no storefront (site) has been deployed. You must either:
- Create a new empty site (which contains no data).
- Import an existing site, such as Storefront Reference Architecture (RefArch) or SiteGenesis.
Commerce Cloud includes RefArch and SiteGenesis sample reference sites, which you can use as the basis of your custom Commerce Cloud Digital sites. They are both full-featured demonstration eCommerce sites, which you can use to explore the Digital platform and its capabilities.
They are a resource for both developers and merchants:
- For developers, it provides sample code scripts and ISML templates.
- For merchants, it provides sample configurations for catalogs, categories, products, and so on.
Unleash Your Coding Potential: Dive into Knowledge with a Click!
- Log in to Business Manager.
- Select Administration → Site Development → Site Import & Export.
- Determine if you want to import the site from a local or a remote instance and select the corresponding radio button.
- Select the Storefront Reference Architecture Demo Sites radio button and click the Import
- You will be sent to a new screen with 2 options to choose from. Select the one that says Storefront Reference Architecture base
- At the bottom right corner, click Deploy.
- The page will reload. You should see a red confirmation message. Click on the OK button on its right side.
- You can view the status of the import in the Status section of the page.
- Wait at least 10 minutes and click on the Refresh button under the Status section. Once the status changes to Completed, your site will be ready to use and it will be listed under the list of sites, right beside the Salesforce logo at the top left corner.
- You will also receive an email that the job has completed.
It is recommended that you import the Reference Storefront Architecture site (RefArch) into an empty sandbox before importing your custom sites. This prevents you from overwriting existing attributes and data for the custom site.
After importing RefArch, you can validate its behavior by comparing it to the site running on the demo instance at https://production-sitegenesis-dw.demandware.net/s/RefArch/home.
Although you won't be really doing this in practice, let's see how to create an empty site.
- In Business Manager, select Administration >Sites > Manage Sites.
- Click New.
- Enter the site ID, "SFRATraining". The ID is required and should not include spaces.
- Enter the Name, "SFRATraining". The Name is required and can be any text string.
- Click the Currency drop-down and select your default currency (usually USD Dollar). You can only have one default currency per site. This is a required field.
- Click Apply.
- Now, you can view or configure your new site.
- To select the site, click the site name, Training, located on the site list.
- Select Site → Storefront. A browser window opens, displaying the storefront URL.
Site Configuration
After creating an empty site, let’s check some final configurations.
Code Version
When you imported your RefArch site it was created along with it a code version. But what is a code version? It is basically a directory with all your cartridges.
B2C Commerce lets you have multiple custom code versions uploaded to the system at the same time. You can name each of your versions as you prefer, for example, v12 or summer_release.
Select Administration > Site Development > Code Deployment and check the existing code version. You will notice one that starts with SFRA_AP. That is the one created for your RefArch Site.
Remember how to check your code_version because you will need it later to sync your local code with the sandbox.
When developing your storefront, you select one active code version with which to work. All templates, pipelines, scripts, and images are taken from this active version and also that’s where your code is uploaded to (check your dw.json file)
So why is it useful to know about code versions?
- You can rollback your storefront to a previous version if necessary; and develop your application with a newer version while maintaining an active storefront on a stable code base.
- When doing Code Replication, the process transfers code versions from staging to a development or production instance and activates them.
- Sometimes, even though you are doing everything right, your code changes are not being reflected to your site. By changing to a different code version and back is a known way to fix the problem when nothing else works.
Disable site caching
In your sandbox to see your code changes immediately on the site, you should disable site caching. This prevents the page cache from taking effect so that pages reflect the most recent code changes. In production instances, the cache is on by default.
- In Business Manager, select Administration > Sites > Manage Sites.
- Select your site name.
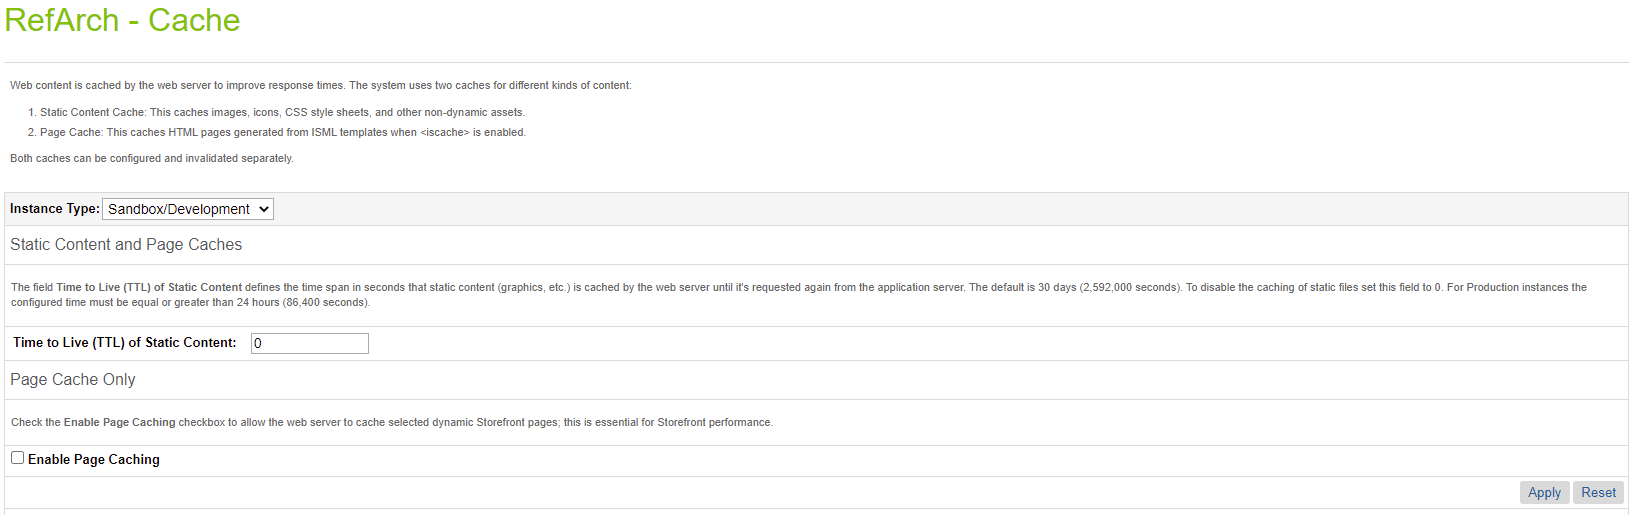
- Select the Cache tab.
- Set the Time to Live value to 0 and uncheck the Enable Page Caching setting.
- Click Apply.
- You should invalidate the cache at this stage. You can Invalidate Page Cache fully or partially.
- Check the status of the SFRATraining site.
Rebuild Indexes
In order for you to see the latest changes in your storefront products, you should always have the indexes rebuilt.
They are rebuilt automatically from time to time but let’s do it manually this time so we don’t have to wait.
- In Business Manager, select the site to index (RefArch).
- Go to the Merchant Tools > Search.
- Click Search Indexes.
- Select the top checkbox Index Type to select all the indexes.
- Click Rebuild.
- The indexes will start to be rebuilt. When complete, the status changes to Online.
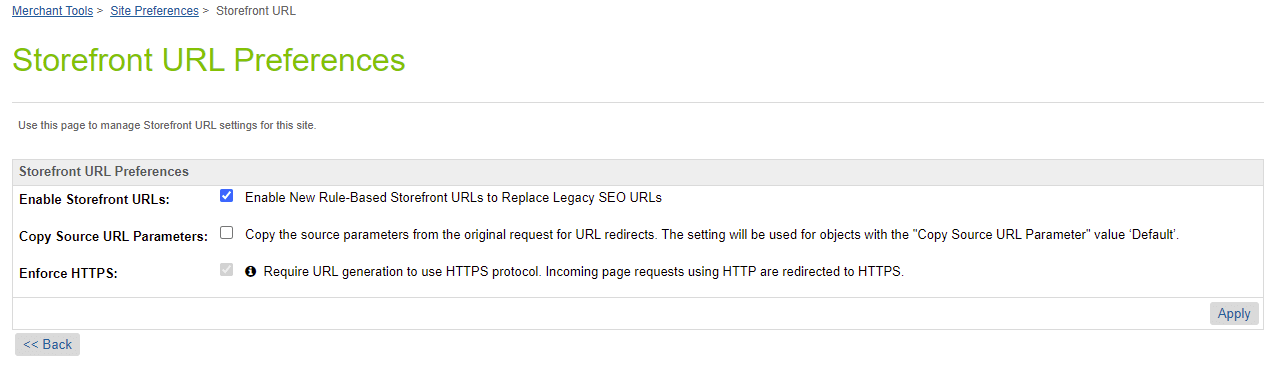
Search-Friendly URLs
In order for us to be able to see our controller calls (backend functions) rather than just categories, we have to enable something called Storefront URLs. In order to do that go to:
Site > RefArch > Site Preferences > Storefront URLs, uncheck Enable Storefront URLs.
How to be a Certified Salesforce Commerce Cloud Developer for FREE
Unlock a FREE PDF with SFCC B2C Certification questions from our Udemy Course. Join our newsletter!
Check your email, you’ll receive a copy in a few seconds. If you don’t see it, please check your spam folder.
SFRA Course on Udemy
- Getting Started with SFCC
- SFCC Business Manager
- Commerce Cloud Catalog
- VSCode setup, sfra github download
- Cartridge path, upload cartridges
- Adding Logic with Controllers
- ISML templates Demandware
- Data models and view models
- Salesforce Script API
- How to use and organize scripts
- Content assets and content slots
- Salesforce Commerce Cloud Forms
- System and Custom Objects
Salesforce Certifications
- B2C Commerce Architect
- Marketing Cloud
- JavaScript Developer I
- B2C Solution Architect
- B2B Solution Architect
- Application Architect
- Technical Architect
- Salesforce Service Cloud